
You can use Searchify to improve the search experience on your Wordpres blog. For that, we have this WordPress plug-in. Just follow the instructions below and you will have all the power of Searchify search in your blog.
About this plug-in
IndexTank's WordPress plug-in will replace your current blog's search with IndexTank's. It will enable you to use your IndexTank index as the search index for your blog.
This plug-in will provide your blog's search with different results sorting functions (time, relevance, number of comments) and a more powerful query language. You will also get InstantSearch, Autocomplete and more accurate search results for your blog.
Installing the plug-in
The easiest way is to use Wordpress' Plugin Manager. Go to your Wordpress dashboard, and find the Plugins -> Add new menu. Search for 'indextank'. On the results page, find 'IndexTank Search' and install it.
If that doesn't work for your blog, you can try downloading the plugin from the link on the right, and upload it to your wordpress installation. You may need to contact your Wordpress administrator to do this.
Plug-in configuration
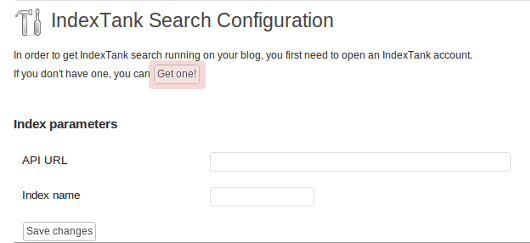
By enabling this plug-in, you will change the behaviour of your blog's search box. Typing a query in that box will now perform a search in an IndexTank's index. This is why you first need to create an index for this purpose. Go to your blog's dashboard, and browse the Tools -> Indextank Searching menu.
On the 'Settings' section, you will see a 'Get one' button. That button will get you and Indextank account, and set up an index. After that, you'll redirected back to the 'Settings' page, but you'll see credentials for your index (API URL and Index name).
Now that you have an account, other sections on the 'Settings' page will be enabled.
- Indexing your posts
- Reset your index
- Look And Feel
In the "Indexing your posts" section, at the bottom of the configuration page, you will find an "Index all posts" button. Click it. You only need to do this to index your documents for the first time, or to reindex them in case something happened.
There's a checkbox to apply 'the_content' filters to posts. You need to check it only if you have plugins that modify the way content is rendered (like MarkDown).
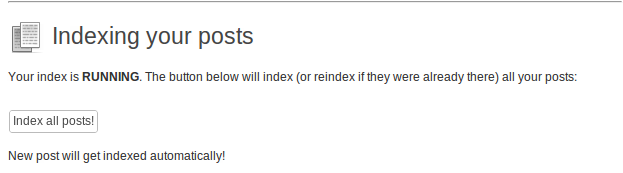
Wait for the confirmation message indicating that the blog posts were successfully indexed. The page won't reload. If you get an error message, check the API URL and the Index Name you entered above. Or you can write to support@searchify.com, including your API URL, Index Name and error message.
You can now test the new search in your blog. Go to your blog's home page and type in the search box. You will find that the autocomplete feature is already enabled. Your blog's search is running with IndexTank!
Configuring Look and Feel
Indextank is compatible with most Wordpress themes out-of-the-box. In order to play nice with your current theme, you need to click the 'Magic' button on the 'Look and Feel' section of the settings page.
It will generate a custom configuration for you, making it possible to render results in a way that completely blends with your theme.